Tutorial on making a chain bracelet with red pearls
Dear friends, how have you been recently? It’s time to share handmade tutorial. Today’s theme is red pearl bracelet.

Let me tell you how to make a simple, unbreakable (and cute!) bracelet accessory. This step-by-step tutorial has a lot of photos and is a perfect beginner project for any age.

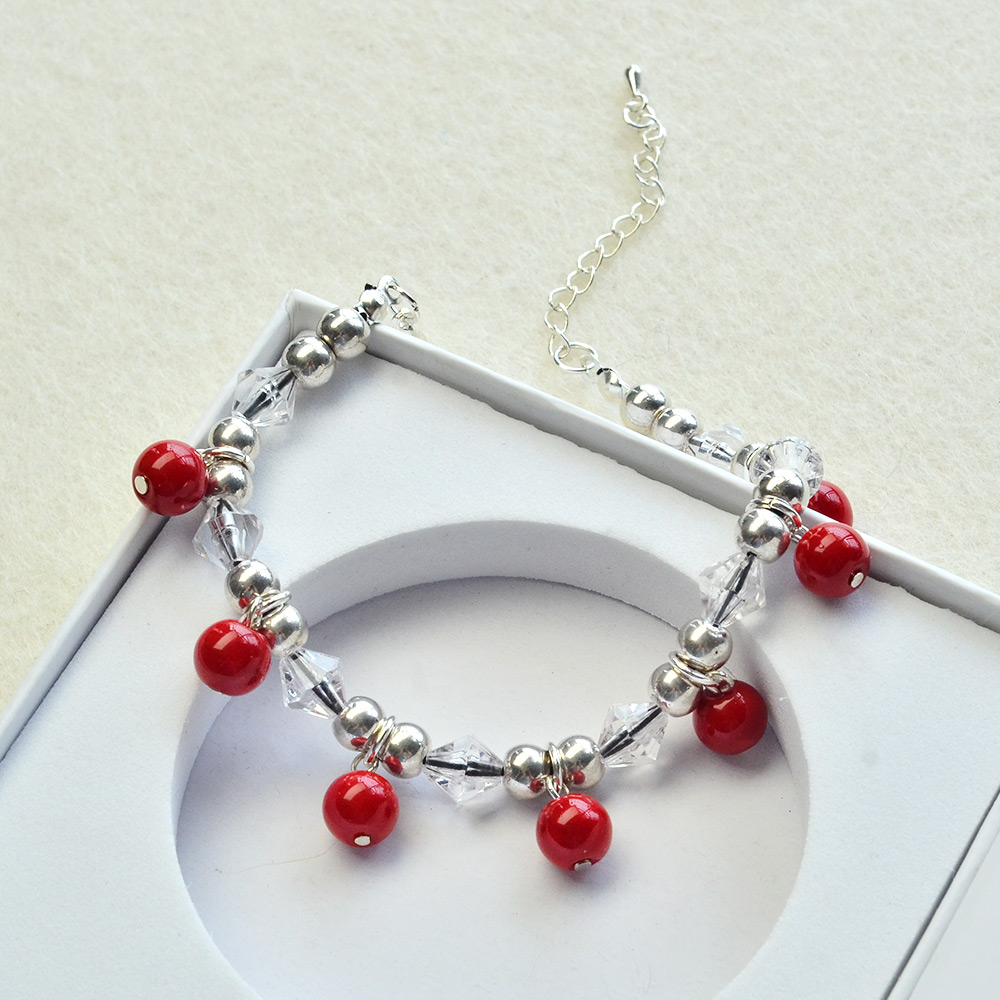
The main part of this bracelet is made up of red pearl beads and transparent three-dimensional beads. The perfect combination of red and transparent colors makes the entire bracelet look purer. Round and solid also make the bracelet look more vibrant. The combination of vision and touch makes the bracelet's grades rise constantly. The bracelet is fond of by many women due to its external charm and inner refinement, So let's start to make a bracelet of our own.

Before start, you need to prepare the relevant tools.
Supplies
jump ring
flat nose pliers
black waxed cotton cord
terminators
mixed brass headpins
How to

Step 1. First to prepare the red glass pearl round beads parts, to through the red beads on the mixed brass headpins, with the assistant of the flat nose pliers to make the headpins into a hoop, string the jump ring on this small ring, which are flexible to move, the same parts need to be prepared seven to eight.
Step 2. Select a length of black waxed cotton cord and hold the end of it with a terminator. The role of the terminator clip combination part is to make the bracelet making process easier to operate. You can use scissors to cut off the excess part.

Step 3. First string two tibetan style beads on the rope, then string a transparent acrylic bead, followed by two tibetan style beads. That is to say, a transparent acrylic bead is sandwiched between four tibetan style beads in a symmetrical structure.
Step 4. It is worth mentioning that a red bead is placed in the middle of each tibetan style beads. In this order, string seven to eight red beads on the black waxed cotton cord. Then the whole part of the bracelet is finished.
Step 5. In the final step, use the flat nose pliers to clamp the end of the cord into the clip, the same method as the other end. Claw the buckle on the jump ring, this step, the whole bracelet is finished.

I hope everyone will like my manual tutorial sharing, meanwhile, welcome everyone to exchange ideas with me and to experience the fun of handmade.


Let me tell you how to make a simple, unbreakable (and cute!) bracelet accessory. This step-by-step tutorial has a lot of photos and is a perfect beginner project for any age.

The main part of this bracelet is made up of red pearl beads and transparent three-dimensional beads. The perfect combination of red and transparent colors makes the entire bracelet look purer. Round and solid also make the bracelet look more vibrant. The combination of vision and touch makes the bracelet's grades rise constantly. The bracelet is fond of by many women due to its external charm and inner refinement, So let's start to make a bracelet of our own.

Before start, you need to prepare the relevant tools.
Supplies
jump ring
flat nose pliers
black waxed cotton cord
terminators
mixed brass headpins
How to

Step 1. First to prepare the red glass pearl round beads parts, to through the red beads on the mixed brass headpins, with the assistant of the flat nose pliers to make the headpins into a hoop, string the jump ring on this small ring, which are flexible to move, the same parts need to be prepared seven to eight.
Step 2. Select a length of black waxed cotton cord and hold the end of it with a terminator. The role of the terminator clip combination part is to make the bracelet making process easier to operate. You can use scissors to cut off the excess part.

Step 3. First string two tibetan style beads on the rope, then string a transparent acrylic bead, followed by two tibetan style beads. That is to say, a transparent acrylic bead is sandwiched between four tibetan style beads in a symmetrical structure.
Step 4. It is worth mentioning that a red bead is placed in the middle of each tibetan style beads. In this order, string seven to eight red beads on the black waxed cotton cord. Then the whole part of the bracelet is finished.
Step 5. In the final step, use the flat nose pliers to clamp the end of the cord into the clip, the same method as the other end. Claw the buckle on the jump ring, this step, the whole bracelet is finished.
I hope everyone will like my manual tutorial sharing, meanwhile, welcome everyone to exchange ideas with me and to experience the fun of handmade.


评论
发表评论